
Since I flew out to SDCC, I also had to make the hammer travel-friendly. Because I still wanted an obnoxiously huge hammer, I decided to make the base and the hammer head detachable. I checked the broomstick as my second bag and wrapped the hammer head in bubble wrap carefully to take as my carry-on. It wasn't easy, but the hammer made it through unscathed both times through 4 different flights!
Materials:
- Styrofoam blocks (the biggest you can find)
- Glue and caulk
- Gesso (I used 2-3 bottles)
- Textured spray paint (I used 2-3 cans)
- Broomstick and connector
- String
- Bell
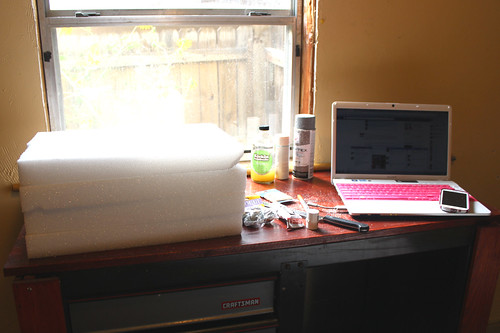 |
| My work station for making this hammer. |
First, gather your materials. I was able to buy everything I needed at a craft store, except for the broomstick and the connector piece, which came from Home Depot. The connector piece was actually found in the plumbing aisle after some help from some kind Home Depot employees. It's just a piece that screws on to the other end of the broomstick.
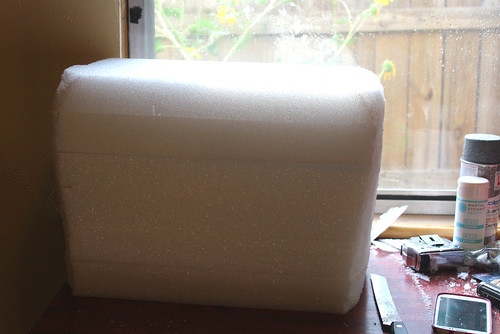 |
| Carving the styrofoam down. |
Next, I cut the styrofoam in half and glued it together. With a serrated knife, I slowly started sculpting the hammer into Ramona's hammer's shape. It's got rounded edges and a wider top than bottom. Be sure to use a serrated knife -- otherwise it'll be near impossible and foam will fly everywhere!
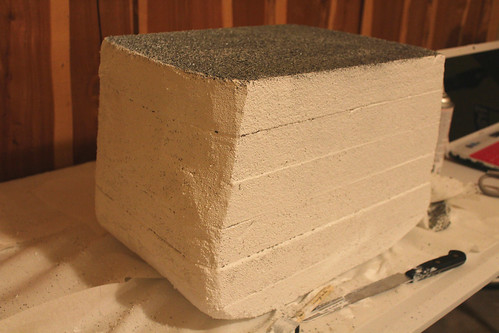 |
| Adding gesso and texturized spray paint. |
I covered the entire hammer in gesso. Gesso is a primer for paint that helps smooth out surfaces. I wasn't totally pleased with the gesso's effect on the styrofoam; the layers were still visible. If I had more time, I may have gone back and covered the entire hammer in tape, plaster, or something similar.
 |
| Note the end of the broomstick. This is what you're looking for at the store! |
While the gesso dried, I painted the base of the hammer pink. I also added the connector piece inside of the hammer head by carving a hole with the knife and securing the piece with glue and caulk.
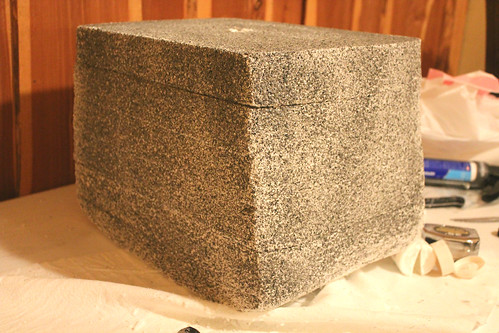 |
| The hammer head after one coat of paint. |
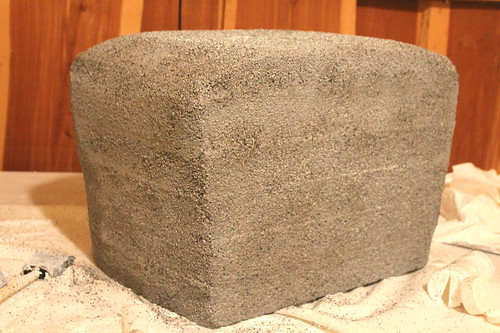 |
| The hammer head after three coats of paint. |
The hammer took about three layers of spray paint to be fully covered. As you can see, the layers of foam are still partially visible. While the layered concrete look is neat, it wasn't what I was going for. If you don't want visible layers, I'd recommend covering the foam with either plaster paper or a similar material.
Tie the bell to the string and then wrap around string on the base of the hammer. To make the hammer less annoying, I added a piece of paper inside the bell so the constant ringing would stop. I also wound up cutting the broomstick to be a little bit shorter. Then simply screw the hammer together when you're ready and you are done!
Just a note: The downside to this method is that the hammer is a little heavier than I was expecting, but it doesn't require math or difficult-to-find materials. Carrying this hammer for a night or a day is totally fine, but the several days of SDCC wore me out!
 |
| You can clearly see the bell and string on the hammer here. |