
 |
| Alternative title: My Face: The Blog Series |
I've said it before and I'll say it again - everything I've learned about makeup, I've learned from cosplay. One of my favorite aspects of cosplay is modifying my look. I love the grey area between reality and fantasy and makeup is one way to explore that.
In addition to making you look more like your character, makeup is extremely important to getting good photos of your costume! You generally have to apply a lot more makeup than you'd think for it to come across on camera, even for a "natural" look. (To see what a difference it makes, check out one of my older costumes - I guarantee I had makeup on and it felt like a lot, but you can't even see it on camera!)
Within this series, I hope to teach you the basics of makeup, especially for cosplay photography, and share my tips for creating the look you want! Keep in mind I'm still a beginner, too, so I'm sharing what I've learned so far. I'll also be recommending products I use and love - I try to use affordable, cruelty-free, and vegan products, so that's mostly what you'll see here.
Without further ado, here's part 1 of the cosplay makeup guide, all about achieving a clean face!
Without further ado, here's part 1 of the cosplay makeup guide, all about achieving a clean face!
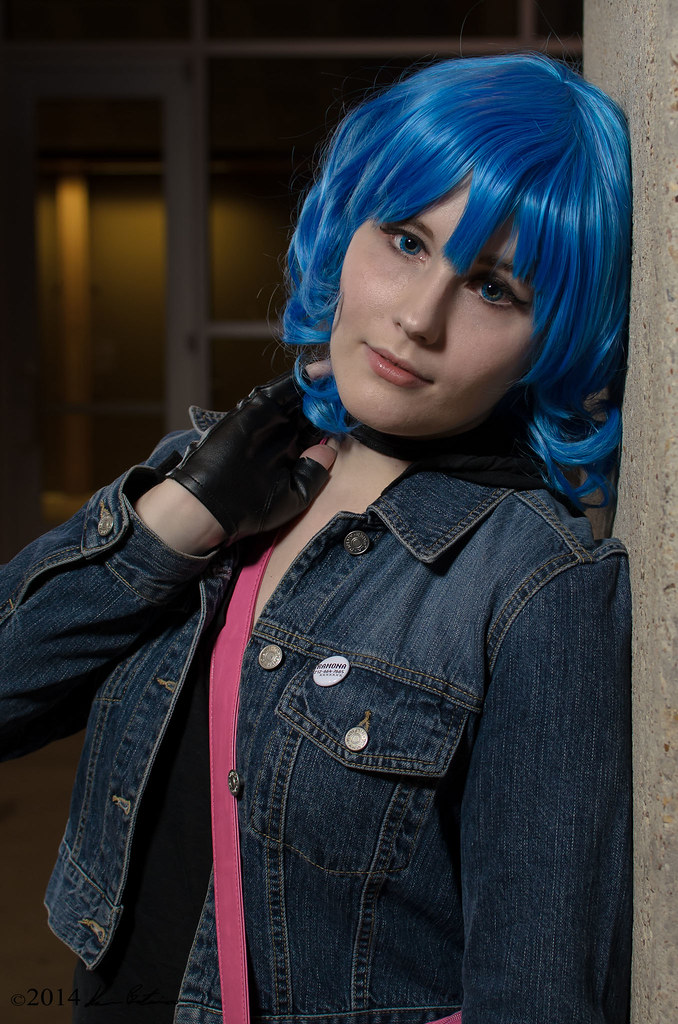 |
You would not believe how many layers of stuff is on my face. (Photo: Sherwin Bartonico)
|
A Clean Face
Makeup, like any art form, starts best with a blank canvas to work from. Replicating fictional characters, who often have simplified (and therefore flawless) skin, is a lot more realistic with a more even skin tone.
Remember - this is just a starting place! If you character has a beauty mark, freckles, or another distinguishing feature, you can always add that on top of your blank face. The idea is to create as smooth and neutral of a canvas as possible.
Remember - this is just a starting place! If you character has a beauty mark, freckles, or another distinguishing feature, you can always add that on top of your blank face. The idea is to create as smooth and neutral of a canvas as possible.
The Basics
The basics are fairly simple and thankfully easy to apply! I start with a primer, which smooths out any fine lines and bumps and makes your makeup last longer (very important for conventions). Next, apply foundation - with a brush or sponge, not your fingers! This ensures a lighter, more even application. Then, conceal any areas that need it. I usually cover any blemishes and my undereye circles. Finish with powder to set your look.
By the way - if you have the time and a beauty store near you, you can go in and ask for someone to match a foundation to your skin tone! One of the beauty gurus working there will guide you through the process so you can discover a foundation that works perfectly for you. This can save a lot of frustration with trying to find a foundation that blends into your skin.
By the way - if you have the time and a beauty store near you, you can go in and ask for someone to match a foundation to your skin tone! One of the beauty gurus working there will guide you through the process so you can discover a foundation that works perfectly for you. This can save a lot of frustration with trying to find a foundation that blends into your skin.
My Recommendations:
- Foundation: e.l.f. Studio Flawless Finish, Tarte Amazonian Clay
- Concealer: Benefit's Erase Paste
- Tools: EcoTools brushes, Beauty Blender
Bonus Steps!
I hesitate to call these steps "optional" because they each make a big difference, but if you're a total beginner, stick to mastering the list above first! When you're ready, learning to apply these products can bring your look to the next level.
Using blush helps bring color into your face and helps you avoid looking washed out (and if you have undereye circles like me, it can draw the eye away from those circles). Be sure to apply it to the apples of your cheeks (the raised areas of your cheeks when you smile) and apply more than you think you need or else it won't show up on camera. Highlighting and contouring is something I haven't mastered yet, but it can totally change your face shape if you master it. Finally, a setting spray is optional, but may help your look stay even longer.
My Recommendations:
- Blush: Benefit Poisetint, e.l.f. HD Blush
- Highlight and contour: Anastasia Beverly Hills Contour Kit*, TheBalm Mary-Lou Manizer Highlighting Powder
- Setting spray: Urban Decay All Nighter Setting Spray
* I haven't used this, but it's getting rave reviews!
Whew! So there you have it - my tips for getting a clean face for your makeup. After creating a nice base, you can make your features really pop! Next week, I'll be covering eye makeup and lip color, so stay tuned.
What are your makeup secrets for achieving an even-looking face?
Previously: